 The USB board shown is just a power
source.
The USB board shown is just a power
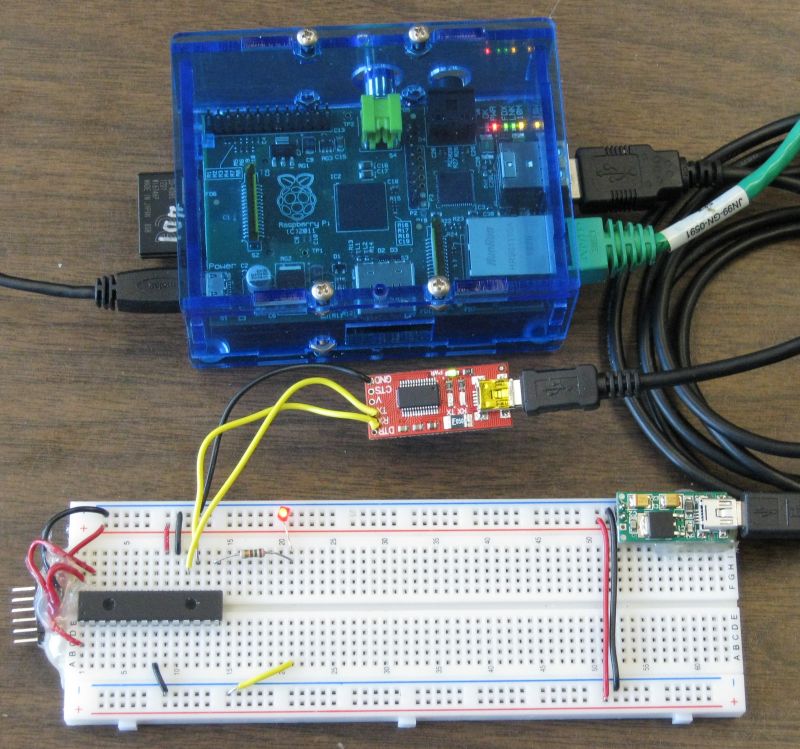
source..... this is continued from raspberry_pi_and_pic18lf2620 That page contains photos and a description of the setup. It also has PIC C18 code for a simple echo program. I have taken the project on step farther and added code for the PIC that will turn an LED on or off in response to keypress on a remote computer or tablet (or android phone). For more on remote access see remote_login
Updates on bitbucket. Have a new adc branch. The ADC can be used to read the voltage on the LED.
Note
The USB board shown is just a power
source.

notes on
setting up /dev/ttyAMA0 for general use at ttyama0_configuration_reset
connections using jumpers at ttyama0_uart
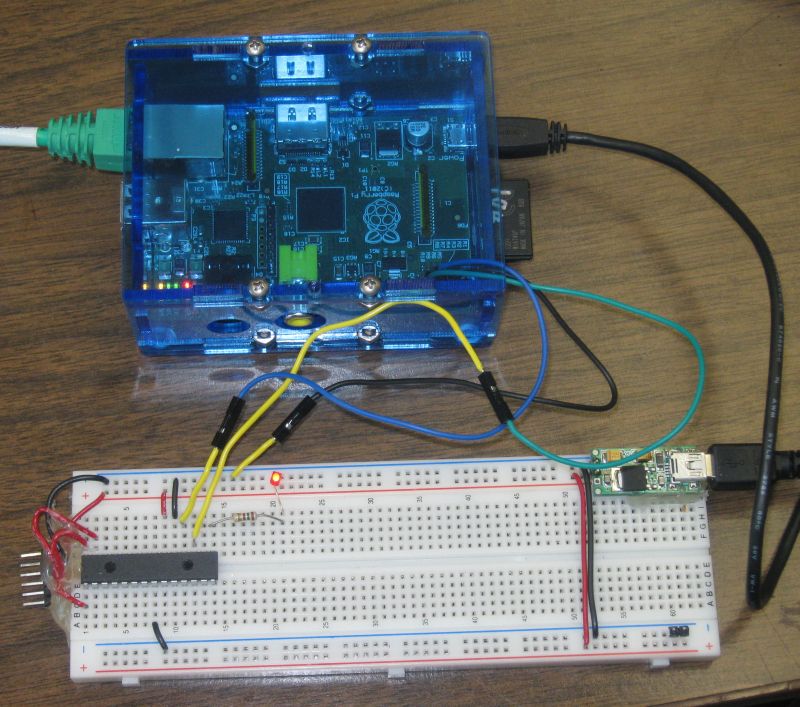
When I ran through options 1 to 6 I was using /dev/ttyUSB0. The same should work for /dev/ttyAMA0 although so far I have only tested option 1 with /dev/ttyAMA0.
The box below was copied from a window on a PC running a PuTTY SSH session. Within the SSH session minicom was run.
Each time a "L" (upper or lower case) is pressed on the PC computer the LED is switched on.
Each time the "F" (upper or lower case) is press on the PC computer the LED is switched off.
pic18lf2620
August 19, 2012 by Dan Peirce B.Sc. Echo to sender & LED.... L - LED on F - LED off
flf lf l
As before but running the python interpreter in interactive mode rather than running minicom.
danp@raspberrypi ~ $ python
Python 2.7.3rc2 (default, May  6 2012, 20:02:25)
[GCC 4.6.3] on linux2
Type "help", "copyright", "credits" or "license" for more information.
>>> import serial
>>> ser = serial.Serial('/dev/ttyUSB0', 115200, timeout=1)
>>> ser.read()
''
>>> ser.write("L")
1
>>> ser.read()
'L'
>>> ser.write("F")
1
>>> ser.read()
'F'
>>> exit()
danp@raspberrypi ~ $
This type a python script was run. The power to the PIC MCU was turned on after the enter was pressed on the remote keyboard (remember the Raspberry Pi is being operated headless and is being controlled in a SSH session).
danp@raspberrypi ~ $ python usb_led.py
        pic18lf2620
August 19, 2012
by Dan Peirce B.Sc.
Echo to sender & LED....
L - LED on
F - LED off

L
F
danp@raspberrypi ~ $
The python script in the file usb_led.py is as follows:
#!/usr/bin/python
# -*- coding: utf-8 -*-
import serial
from time import sleep

ser = serial.Serial('/dev/ttyUSB0', 115200,  timeout=5)
input = ser.read(105)
print input
ser.close()
sleep(2)
ser = serial.Serial('/dev/ttyUSB0', 115200,  timeout=1)

ser.write("L") # turns LED on
print ser.read()
sleep(2)
ser.write("F")
print ser.read()
ser.close()
Since I have PHP installed on this Raspberry Pi I thought I would try a php script from the command line first and then try it as part of a web page.
https://www.assembla.com/spaces/fritzbee/messages/10285 -- adapted this example
http://www.phpclasses.org/browse/file/17926.html -- source of php_serial.class.php
<?php
include "php_serial.class.php";

// Let's start the class
$serial = new phpSerial;

// First we must specify the device. This works on both linux and windows (if
// your linux serial device is /dev/ttyS0 for COM1, etc)
$serial->deviceSet("/dev/ttyUSB0");

// We can change the baud rate, parity, length, stop bits, flow control
$serial->confBaudRate(115200);
$serial->confParity("none");
$serial->confCharacterLength(8);
$serial->confStopBits(1);
$serial->confFlowControl("none");

// Then we need to open it
$serial->deviceOpen();

// To write into
$serial->sendMessage("L");

// Or to read from
$read = $serial->readPort();

// If you want to change the configuration, the device must be closed
$serial->deviceClose();
I have also created a file off.php. It is exactly the same except it sends a "F" rather than an "L".
I have Apache and PHP installed on the Raspberry Pi so it is possible to run PHP scripts that interact with the PIC from a remote web browser.
This example works initially but needs to be improved for better reliability -- I have not come back to this in some time. Instead I have used VNC which has not given me any problems.
For Apache to access /dev/ttyUSB0 www-data must be in the dialout group.
sudo adduser www-data dialout
To check if www-data is in the dialout group use id:
danp@raspberrypi /var/www $ id www-data
uid=33(www-data) gid=33(www-data) groups=33(www-data),20(dialout)
danp@raspberrypi /var/www $
Once added it is necessary to restart the R-Pi (or at least Apache) for the new group to actually take effect.
The web page on.php can be used to turn the LED on. Another web page off.php can be used to turn the LED off. Each contains a link to the other.
This screen shot was made at home. In the richmond lab the IP address to set the browser to is 10.3.30.237
This example has been kept very simple. No attempt has been made to check to see if the LED is actually on or off. More than one remote computer/tablet/phone can access the web page so with this simple version someone else could change the state of the LED and the change in state is not reported. Much could be done to expand the example.
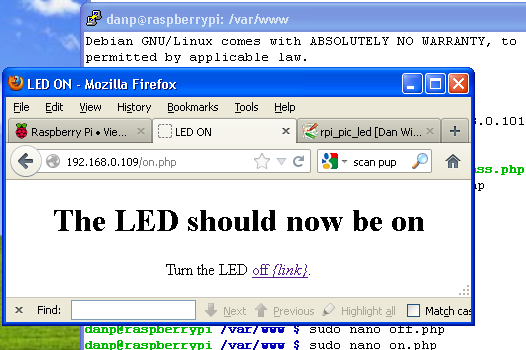
on.php looks link this:
<html>
<head><title>LED ON</title>
</head>
<body>
<center><h1>The LED should now be on</h1>

<p>Turn the LED <a href="off.php">off <i>{link}</i></a>.</center>
</p>
<?php
include "php_serial.class.php";

// Let's start the class
$serial = new phpSerial;

// First we must specify the device. This works on both linux and windows (if
// your linux serial device is /dev/ttyS0 for COM1, etc)
$serial->deviceSet("/dev/ttyUSB0");

// We can change the baud rate, parity, length, stop bits, flow control
$serial->confBaudRate(115200);
$serial->confParity("none");
$serial->confCharacterLength(8);
$serial->confStopBits(1);
$serial->confFlowControl("none");

// Then we need to open it
$serial->deviceOpen();

// To write into
$serial->sendMessage("L");

// Or to read from
//$read = $serial->readPort();
// echo "<br>sent an an <b>L</b> and recieved an <b>$read</b>.";

// If you want to change the configuration, the device must be closed
$serial->deviceClose();

?>
</body>
</html>
off.php looks much the same.
As stated in the previous section the PHP code is adapted from
Target for this C program is the Raspberry PI. Writing C programs for Linux is relatively new to me so I am taking this slow step by step.
I am essentially using the code from the "HOWTO" section 3.2 with some modifications.
Modifications were made so it will compile without warnings or errors.
Write statements were added to tell the PIC to turn the LED on and off.
Configuration was changed so that read() statements will wait up to 0.1 seconds for a character to arrive (if nothing is in the input buffer. Original code waited for at least one character to be received. Changes made to the newtio.c_cc[] so that if nothing is in the receive buffer it will wait up to 0.1 seconds for input to arrive or return with a null string.
Lines added or modified contain a comment using the single line comment method (the original comments still intact use the multi-line format even when on just one line.
So far this code is appearing to be reliable.
I plan to revisit option 5 which was not reliable. Perhaps I will use C code like this to access the actual port. Perhaps the PHP code could leave a message in a file and the C code could pass on the message to the PIC. In that case a channel to ttyUSB0 could be keep open.
  #include <sys/types.h>
  #include <sys/stat.h>
  #include <fcntl.h>
  #include <termios.h>
  #include <stdio.h>
  #include <unistd.h>     //added for read() write()
  #include <strings.h>    // added for bzero()

  #define BAUDRATE B115200                     // set for 115200 bps
  #define MODEMDEVICE "/dev/ttyUSB0"           // set for FTDI on ttyUSB0
  #define _POSIX_SOURCE 1 /* POSIX compliant source */
  #define FALSE 0
  #define TRUE 1

  volatile int STOP=FALSE;

  int main(void)
  {
    int fd, res;                          // removed variable "c" since it was not used
    int count=0;                          // added count variable
    struct termios oldtio,newtio;
    char buf[255];

    fd = open(MODEMDEVICE, O_RDWR | O_NOCTTY );
    if (fd <0) {[perror](http://www.opengroup.org/onlinepubs/009695399/functions/perror.html)(MODEMDEVICE); return (-1); }        // removed error(-1) and added return (-1)
                                                           // since error() was giving compiler warnings

    tcgetattr(fd,&oldtio); /* save current port settings */

    bzero(&newtio, sizeof(newtio));
    newtio.c_cflag = BAUDRATE |  CS8 | CLOCAL | CREAD;  //changed so can write **removed | CRTSCTS **
    newtio.c_iflag = IGNPAR;
    newtio.c_oflag = 0;

    /* set input mode (non-canonical, no echo,...) */
    newtio.c_lflag = 0;

    newtio.c_cc[VTIME]    = 1;   // inter-character timer used and set to 0.1 second **this is a change**
    newtio.c_cc[VMIN]     = 0;   // minimum characters to read 0  **this is a change**

    tcflush(fd, TCIFLUSH);
    tcsetattr(fd,TCSANOW,&newtio);

    write(fd, "L", 1);                     // tells the PIC to turn on the LED  ** this is new **
    while (STOP==FALSE)      /* loop for input */
    {

      if(count==100) write(fd, "F", 1);     // new from here
      if(count==200) write(fd, "L", 1);     // used steps of 100 so it was easy to measure timing (10.0 seconds)
      if(count==300)                        //  keep in mind the current PIC program will
      {                                     //    echo everything received back to the R-Pi
         write(fd,"~F\r",2);                //    When the PIC receives an "L" it turns the LED on
         count=0;                           //    When the PIC receives an "F" it turns the LED off
      }                                     //
      count++;                              // to here
      res = read(fd,buf,255);   // will wait up to 0.1 seconds for input
      buf[res]=0;               /* so we can printf... */
      [printf](http://www.opengroup.org/onlinepubs/009695399/functions/printf.html)("%s", buf);                    // print statement changed so only prints received characters
      if (buf[0]=='~') STOP=TRUE;
    }
    tcsetattr(fd,TCSANOW,&oldtio);
    close(fd);
    return 0;

 }
(option 7)
...working on this... The plan is to combine the serial interface from running_a_simple_python_script_option_3 with from_wwwbinarytidescom_python- socket-programming-tutorial
The C program runs on a PIC18LF2620 (or PIC18F2620). Created a git repository for this project as I plan to continue to develop it. Posted to bitbucket
The code that had been shown here is now on bitbucket https://bitbucket.org/d anpeirce/pic18_serial_io/changeset/ed7f201c3c146ea327c74c33dcc0bc7e584792c6
commit ed7f201c3c146ea327c74c33dcc0bc7e584792c6
Author: Dan Peirce <peirce.dan@gmail.com>
Date:   Sat Oct 6 13:58:54 2012 -0700

   ...two more corrections: tested as I remember
I have added code so that an output buffer is used. printf() now prints to a 120 character buffer and a function in the main event loop sends one character at a time to the UART when space is a available on the UART's small two byte buffer. This is to avoid long messages blocking other operations of the PIC (like listening to the input of the UART).
The code with the output buffer is available at: https://bitbucket.org/danpei rce/pic18_serial_io/changeset/ed7116075280c466811d123fc5dd9b29aa8d32cb
commit ed7116075280c466811d123fc5dd9b29aa8d32cb
Author: Dan Peirce <peirce.dan@gmail.com>
Date:   Sat Oct 7 00:49:43 2012 -0700
Made a change to echoRx() to make use of the Output Buffer by using printf(). This should ensure the UART is not and ensure that the character echoed will not land in the middle of a longer message.
https://bitbucket.org/danpeirce/pic18_serial_io/changeset/b8c10af1b10db01f6e4 be1791bb2717905f0ad9b
Bitbucket provides a convenient way to make the entire project available including different versions and new features added.